Nordic Snowflake Cowl

I’m not sure how many of you know but I teach crochet classes down at my LYS (local yarn shop) Lisa’s Sew Crafty. We started with a basic dc infinity scarf and have just finished up a bunch of snowflakes. I wasn’t entirely sure what I wanted to do next. It was then that R from Sit n Stitch mentioned she’s never done color work and would be interested. LIGHT-BULB!! What if we did a tapestry style cowl?? What if it was winter themed?? Off to Ravelry I went!
SnowflakeCowl1

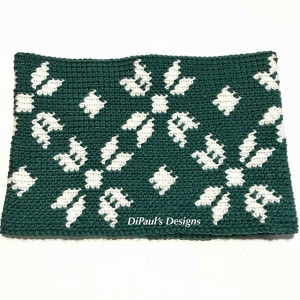
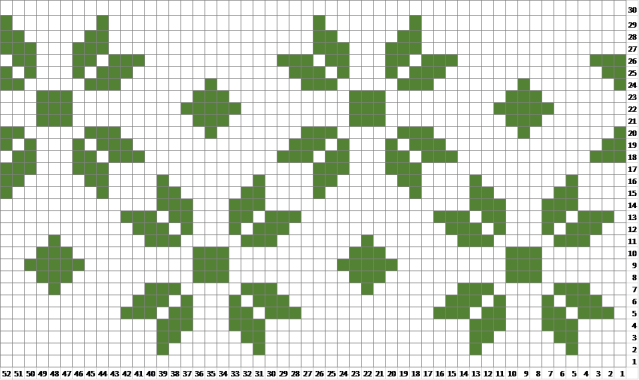
But I wasn’t happy with what I was finding. Off to Excel I went! After fiddling with those pesky squares for what seemed like hours (ok it was probably only one in reality) I had ended up with my Nordic Snowflake design! All that was left to do was grab some yarn and figure out a gauge. I used Ella Rae Cozy Soft Chunky in Forest Turtle and White Rocking Sheep with a 5.5mm hook. After a little math and some re-configuring my graph, I came up with a finished dimension of 25″ around by 7.5″ high. Perfect!
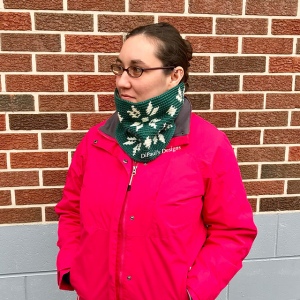
SnowflakeCowl2

So without further ado, here is my very own Nordic Snowflake Cowl!! I hope you all have fun making this and feel free to share your finished projects here or on Ravelry!

Materials:

  • 5mm (US-I) crochet hook
  • Any aran weight yarn in two colors (I used Ella Rae Cozy Soft Chunky)
    • Color A (main color): 150 yards / 115 grams
    • Color B (accent color): 65 yards / 50 grams
  • Tapestry / yarn needle

Gauge:

  • 16.5 sc x 4 rounds in BLO = 4” x 1”

Terms Used:

  • St = stitch
  • Ch = chain
  • Sl st = slip stitch
  • Sc = single crochet
  • BLO = back loop only

Notes:

  • This pattern is worked one round at a time with a slip stitch join to the beginning of every round
  • The ch 1 at the beginning of each round does not count as a stitch
  • After round 1, every round is worked into the back loop only
  • Rather than changing, cutting, using bobbins, and weaving all the ends, the yarn is carried throughout the cowl. The active yarn is worked over the inactive yarn. This technique is called tapestry crochet
  • Graph is started at the bottom right corner. It is then read right to left and down to up. This is so that as you crochet your finished project will look like the graph
  • Each row of the graph is done twice in order to achieve proper circumference

Finished dimensions:

  • Circumference – 25 inches
  • Height – 7.5 inches

Instructions:

Color A: ch 104, sl st to form a ring. Be careful not to twist the ch!

Round1: Color A: ch1, sc in each ch around, sl st to first sc – 104sts

Round2-30: Working in BLO, read chart switching colors when needed – 104sts
NordicSnowflakeCowlGraph


Pokemon Egg Pouch

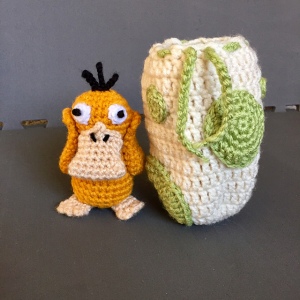
I wanted to surprise my sister with some of the Pokemon so I decided to hide a couple of them in some Egg Pouches. This way it would be like she hatched them! Keeping with the theme I used Nichole’s Nerdy Knots’ Pokemon Egg Pouch pattern. I used RHSS in Aran and Vanna’s Choice in Sweet Pea with a 5mm hook. It turned out to be 5.5 inches tall.

So my Pokemon didn’t fit inside the egg the way it’s written. So I modified it so they would fit. I’ll share those modifications with you all if you find your Pokemon also don’t fit.

EggPouch1

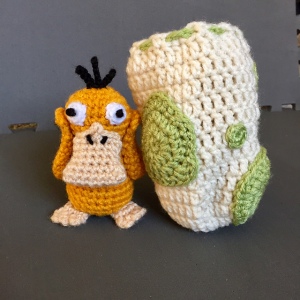
The Pouch: I did the dc rounds up to 12 rounds total for Mew and up to 13 rounds total for Dratini. I kind of had to squish Dratini in there but he made it.

I wanted my spots to look like the spots on the eggs in the game as much as possible. So I went off of those from what I could see and just made up the others/back sides as I saw fit. These directions for the spots are of my own design

EggPouch2

Main Spot on the egg in the game
Rnd1: mr 6sc
Rnd2: inc around
Rnd3: *sc, inc* around
Rnd 4: 2sc, inc, 2sc, inc, 4hdc, dc, (dc, tc), dc, hdc, sc inc, 2sc, inc

Bottom Spot:
Rnd1: mr 8sc
Rnd2: *sc, inc* around
Rnd3: *hdc, inc* around
Rnd4: 2sc, inc, 2hdc, inc, 2dc, inc, 2hdc, inc, 2sc, inc, 2sc, inc, 2hdc, inc, 2dc, inc

Back Spot:
Rnd1: mr 7sc
Rnd2: *hdc, inc* around
Rnd3: *hdc, inc* around
Rnd4: 2sc, (3hdc), 3hdc, 2sl st, sc inc, sc inc, sc, inc, 2sc, inc, dc inc, hdc, sl st, 2 sc, inc

Medium Spot:
Rnd1: mr 6sc
Rnd2: *sc, inc* around

Small Spots (2):
Rnd1: mr 6sc

I followed the pattern for the string and it made the perfect little drawstring pouch! I freaking love it!! This would be great for making and leaving as little gifts in parks as Random Acts of Kindness for other players!

On The Hook:

  • Mom’s Beanie
  • Tea Tray Doily
  • Knitted Beanie

C2C Pillow

Since I was delivering that giant blanket to E I wanted to make her a present too. I actually think it was a late Christmas present. I wanted to give her something functional this time. So I figured a pillow would be perfect!

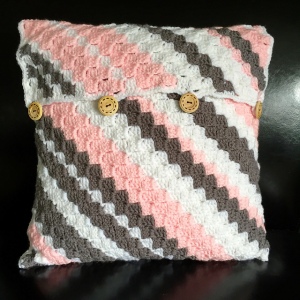
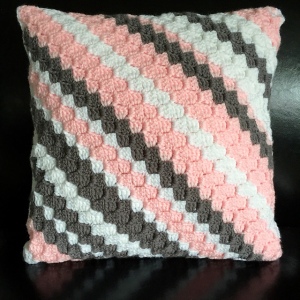
I chose the c2c (corner to corner) method because it was new to me at the time and I was in love! I picked three colors I knew she’d like and used that amazing random stripes generator. I wasn’t sure how long to make this one so I chose an absurdly large number and just stopped when it was long enough to wrap around the pillow.

pillow1

I used Big Twist Value in Medium Gray, and RHSS in Baby Pink and White with a 5.0mm hook. I also used a 14 x 14 inch pillow square insert. I crocheted up a rectangle that was both wide enough for the pillow and then long enough to go over the top and create a flap that I could button on. I wanted her to be able to easily take the insert out and be able to wash the case.

pillow2

I did a sc border around the whole rectangle in white. On one of the short sides I made sure to include button holes. I then seamed up two of the longer sides 14 inches for the height of the pillow. I then attached some buttons to the front of the case to keep the flap down.

pillow3

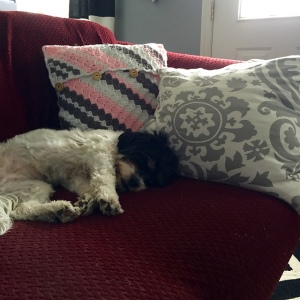
I think it turned out great! Even little Maggie approves! Most definitely a quick and easy way to make a pillow case. Now I need to pick some colors out and make some for new my couch

On The Hook:

  • Baby Girl Dress
  • Baby Boy Things
  • Floor Poof

Charcoal Block Blanket

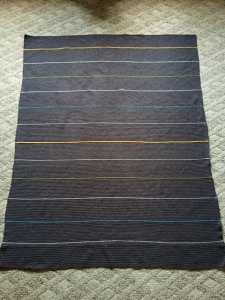
I was asked by my friend E to make a blanket for her husband A a long while ago. I was a little nervous to do it because of its size. He’s well over 6 foot tall so this blanket needed to be huge. It actually rivals the one I made for Luke (who is also over 6 foot). She had given me a picture of a blanket she saw somewhere on the internet and asked to make one using the same blocking/stripping pattern but in different colors. I looked all over for a pattern but couldn’t find one and had to make my own. Which wasn’t difficult. Just needed to make my gauge and do some math. No big deal.

It was terrible. It was super simple to make since it was just row upon row of sc. It was just so boring because it was row upon row of sc. I did a lot of binge watching on Netflix during this blanket. I used my (then) favorite ergonomic Boye 5.0mm hook. I mean I had to, this thing was going to take forever and I needed my hand to be comfy.

CharcoalBlock1

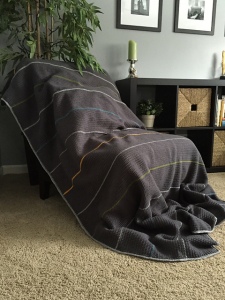
The main blanket was done using RHSS in Charcoal. The contrast colors were Lion Brand Heartland in Glacier Bay, Lion Brand Wool-Ease in Avocado, Red Heart Soft in Light Gray Heather, and RHSS Gold. There was 376 total rows consisting of 28 rows in each charcoal block, 13 total blocks and one row of contrast color between each with the color sequence repeating twice. Finished measurements were 62 x 80 inches or 5.2 x 6.7 feet! I told you, it was a behemoth.

CharcoalBlock2

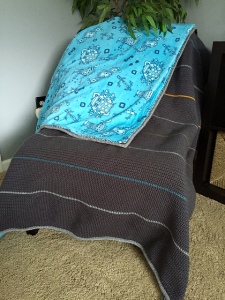
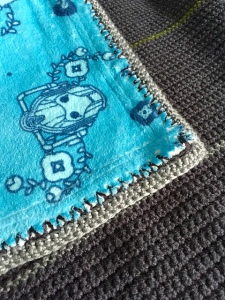
E wanted this thing as comfy cozy as possible and asked that it be lined with fleece. Awesome! I had been wanting to try this technique so I was eager but also very nervous that I’d mess it up. She had ordered this beautiful Doctor Who fleece. Now was the make or break time to attach.

I got a rotary cutter with an extra wide skip stitch blade and used it along all four edges to create equally spaced holes in which my hook would be inserted. Worked like a dream! I did have to press a little extra hard so I made sure I had proper backing so I wouldn’t cut through the surface I was working on.

CharcoalBlock3

To attach I made sure the blanket and the fleece were pinned together and then I single crocheted the two together using the Charcoal. Not every stitch of the blanket was used since the holes in the fleece were not that close together. It’s fine though and everything is still together. I finished it off with 3 rounds in the Light Gray Heather.

CharcoalBlock4

It is amazing!!! I wish I didn’t have to give it away. It’s so big and cozy, heavy, and super warm! Just my kind of blanket. This was the most documented project I’ve done. I ended up using a total of 13.36 skeins of yarn for a grand total of 4,654 yards used!! ::faint:: Do you know how far that is? That’s 38.78 football fields (including end-zones). That’s more fields than the NFL has teams! It’s also 2.64 miles. MILES OF YARN! That’s just a little info about what it takes to make projects like these (and why they cost what they cost).

I’m not sure if I’ll ever make another blanket of this size. And if I do, it’ll be for me. Because I’ve never made a blanket for myself. Which is saying something because I have somewhat of a blanket addiction. I can think of 4 off the top of my head that are all partially started for myself that’ll probably never get finished. Sigh. One day….

On The Hook:

  • Baby Girl Dress
  • Baby Boy Things
  • Floor Poof

Kitty Turn Tail Coasters

The first time I saw a crocheted cat butt coaster was probably a couple years back. So they’re not a new thing, just a new to me thing. I had never made one because 1 – I don’t have cats and 2 – no one asked. Until a couple weeks ago that is.

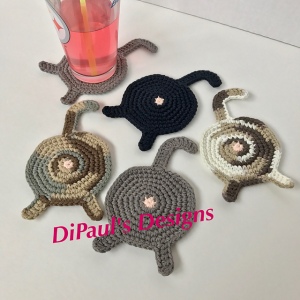
My sister R (well I should say M but I always call her R so I’m sticking with that letter) asked me if it would be possible to make her a set because she had just saw them on the interwebs and fell in love. I said yes and went in search of natural cat colored cotton. Which to be honest, is a little hard to find. I have a bunch on hand but have you ever seen a green, pink, or yellow cat?! Please show me if you have one. I on the other hand still don’t have any cats. Side note, I also found myself in the yarn aisle asking Luke “is this a good shade of pink for a cat’s butt hole??” And while working these up I was also asking myself “can you see the butt hole well enough in this variegated yarn??” Two questions I hope to NEVER ask again.

kitty-turn-tails-group

There’s a bunch of patterns out there for these but it’s simple enough that I wanted to work up my own. And that’s what I did. Calm your kitties, yes I plan to share the pattern 🙂 My mom, who also has no cats, has commissioned me to make some dog butt coasters. So I’ll be working on those within the next few days. I don’t believe I’ve seen those so I’ll be sharing that pattern as well. And I might make some cat/dog face coasters. No noses or whiskers but some ears. So keep your eyes open for those posts.

Without further ado, here’s my very own cat butt coasters pattern! BE WARNED these have NOT been tested!! So feel free to comment, message, email or whatever if you have questions or spot an error! Also this is using US terms.

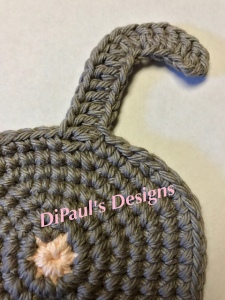
kitty-turn-tails-close-up

Kitty Turn Tail Coaster Pattern

I used a 4.00mm hook and Lily Sugar ‘n Cream  yarn in Camomile for the butt and Earth Ombre, Overcast, and Black for the different cats. I also worked this as a spiral. So no slip stitching to the first stitch!

Round 1: With Pink, 7sc inside Magic Circle

Change to cat color

Round 2: inc in each st around [14]

Round 3: (sc, inc) in each st around [21]

Round 4: (2sc, inc) in each st around [28]

Round 5: (3sc, inc) in each st around [35]

Round 6: (4sc, inc) in each st around [42]

Round 7: (5sc, inc) six times, 6sc [48]

Round 8: chain 13 (tail), dc in third ch from hook, 2dc in next, 1dc, 2dc, 2dc, 6dc, 1dc in side of last sc of round 7 (should be a total of 15dc in tail), skip one sc, 18 sc, chain 6 (leg one), dc in third ch from hook and next three, 1dc in side of last sc, skip one sc, 7sc, chain 6 (leg two), dc in third ch from hook and next three, 1dc in side of last sc, skip one sc, 16sc, skip one sc, sl st in next, finish off.

Weave in your tails and you now have a completed cat butt coaster!!

*** Please feel free to share this and your finished projects with others. I just ask that you please link back to my post. Please do not copy this pattern and claim it as your own ***

On the Hook:

  • Doggie Turn Tails
  • Cabled Messy Bun Beanie
  • Birthday Scarf